Sign your Work please.
I have several git hosting provider accounts (GitHub,Azure Devops,Bitbucket, Gitlab, and others) and I work in several computers, and something that gives me such pain is to introduce my credentials whenever I want to push my work, either to my repositories, either to third-party repositories. Git (on the server) came to my rescue by providing SSH support, so by doing some magic and associate my SSH public key to the git server, I can push my commits and don’t have to enter any credentials. All well known provided have this security feature by default and the SSH key registry is similar.
Another challenge that I face is how to verify the identity of the user that did that commit. Can I trust that user? When you work in a close environment, such as private projects, you know the team and only they can/may access the project. However, when your repositories are public and you follow a collaborative workflow (fork, pull request, git-flow), how do you verify the identity of the users?
From the Git web site 7.4 Git Tools - Signing Your Work you can read:
Git is cryptographically secure, but it’s not foolproof. If you’re taking work from others on the internet and want to verify that commits are actually from a trusted source, Git has a few ways to sign and verify work using GPG.
So I analyzed my git host providers and, once again, all of them support this feature what is great.
In this article, I will describe how to configure your machine to sign your commit in Windows 10.
Why mentioning “Windows 10”?!
Because the procedures described in the “how-to” of the providers don’t quite work on Windows 10. Some extra steps are necessary.
Requirements
Stating the obvious, You need GPG installed in your machine. So, go to the GnuPG homepage choose the right package, and install in your machine.
Generate Your Key
Generating the key is easy. You just execute one command and reply to the questions when prompted. Some parameters are important, such as:
- Kind of key: RSA and RSA (default).
- RSA key length: 4096.
- Real name: User real name.
- Email address: User git hosting provider email account.
- Password: User password. Blank for no password.
Command to be executed:
$ gpg --full-generate-key
By now you should have your new GPG key.

Going forward.
Configuring Git
Right now you have two choices:
- Sign every commit by adding adicional parameters.
- Configuring git globally to sign every commit.
For the first option, every time you commit, you’ll ad -S parameter:
$ git commit -S -m your commit message
# Creates a signed commit
For the second option, you add the following command to add to your .gitconfig.
Identify your GPG Key
$ gpg --list-secret-keys --keyid-format LONG
Output:
------------------------------------------------
sec   rsa4096/33E296A4A76B72E3 2020-09-22 [SC]
      46DF5452CA57FA376673E5C633E296A4A76B72E3
uid                 [ultimate] Nuno Cancelo <nuno.cancelo@noemail.com>
ssb   rsa4096/79A0CC6FC7C853F9 2020-09-22 [E]
From the sec line, extract the signkey after rsa4096/. In this case, will be 33E296A4A76B72E3.
Add user signkey.
$ git config --global user.signingkey 33E296A4A76B72E3
The option –global is important, so the option is added the the .gitconfig, otherwise will be added to current project only.
Explicit the intend of signed commits
$ git config --global commit.gpgsign true
This option specifies that all commits should be signed.
Special Windows 10 step
By default, Git will not find gpg to do their work. It’s not a design flaw, but he doesn’t know where the executable is located to do their work, so we have to help him.
Find GPG location
$ Get-Command gpg | Select-Object -ExpandProperty Definition
Output
$ Get-Command gpg | Select-Object -ExpandProperty Definition
C:\Program Files (x86)\Gpg4win\..\GnuPG\bin\gpg.exe
Add GPG program to the .gitconfig
git config --global gpg.program "C:\Program Files (x86)\Gpg4win\..\GnuPG\bin\gpg.exe"
We are almost there. We just have to add the GPG key to our git host provider.
Add to Git Host Provider
To obtain the gpg public key to add to the git host provider, we just have to execute the following command and identify the signkey:
$ gpg --armor --export 33E296A4A76B72E3
Copy your GPG key, beginning with —–BEGIN PGP PUBLIC KEY BLOCK—– and ending with —–END PGP PUBLIC KEY BLOCK—–, and add it to your git host provider:
- Adding a new GPG key to your GitHub account.
- Adding a GPG key to your Gitlab account
- Adding a GPG key to your Bitbucket account
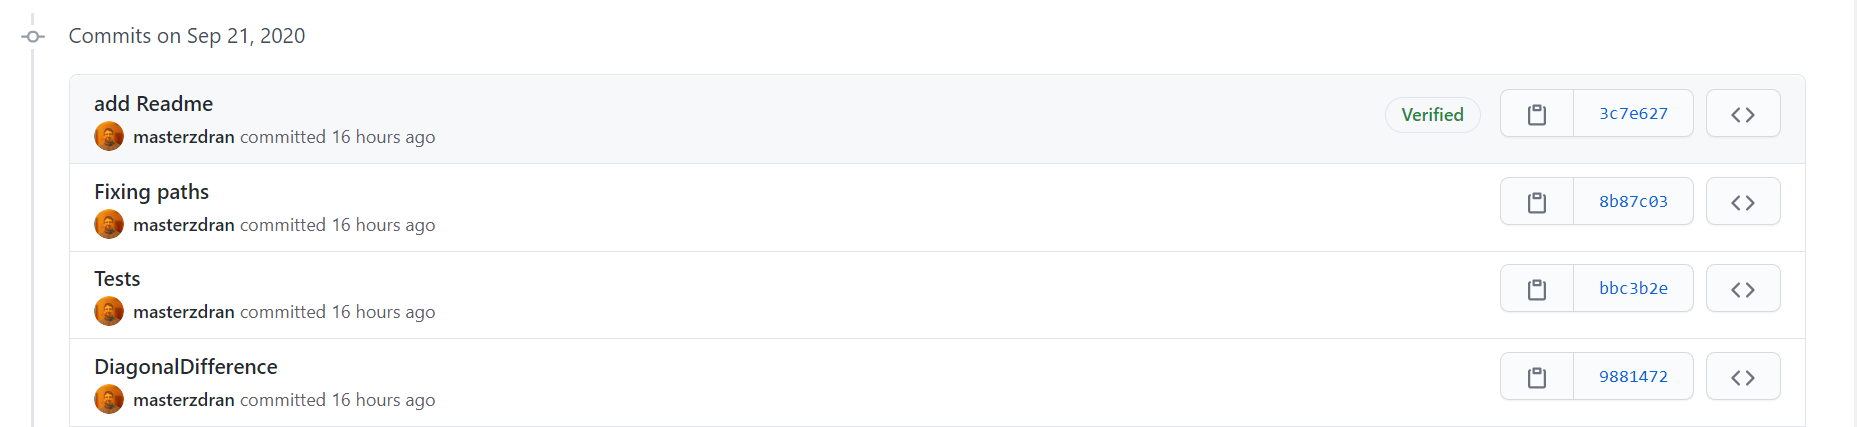
Testing
Now, whenever you commit your work, these commits will be automaticly signed. After you push, you’ll notice in your git host provider, that your commits are now signed.

Remark 01 It is very important that the GPG Email Account is the same as the git host provided in order to the commit signing be verified, otherwise the commit will no be marked as signed.
Remark 02 If you work on multiple projects/repositories/accounts on the same machine, consider using the configuration on the project/repository configuration. Otherwise, you’ll spend to much time changing global configuration… if you remember to do that before the commits :)
Conclusion
Configuring commit signing is not complex, but on windows it has a “speacil” step that must be done. By signing your commit, you are stablishing your identity and stating to other users that you are identified and they can trust you.
References
- Github: https://docs.github.com/en/github/authenticating-to-github/managing-commit-signature-verification
- Gitlab: https://docs.gitlab.com/ee/user/project/repository/gpg_signed_commits/
- Git: https://git-scm.com/book/en/v2/Git-Tools-Signing-Your-Work
- Bitbucket: https://confluence.atlassian.com/bitbucketserver/using-gpg-keys-913477014.html