OrchardCore, CMS for ASP.NET Core (Part 01).
ASP.NET Core has been out there for quite some time and following the challenge of a great friend (kudos @psijkof) I started to look at Orchard Core.
From the official Orchard Core documentation, which describes Orchard Core as:
Orchard Core is a redevelopment of Orchard CMS on ASP.NET Core.
Orchard Core consists of two different targets:
- Orchard Core Framework: An application framework for building modular, multi-tenant applications on ASP.NET Core. Orchard Core CMS: A Web Content Management System (CMS) built on top of the Orchard Core Framework.
It’s important to note the differences between the framework and the CMS. Some developers who want to develop SaaS applications will only be interested in the modular framework. Others who want to build administrable websites will focus on the CMS and build modules to enhance their sites or the whole ecosystem.
The project seems promessing and I start to take a look at it, in my (few) free times.
This article (and the follow ones) is my contribution to the ones that are starting and are facing some of the same challenges that I faced (and still facing).
Posts Planning
This set of posts will cover several parts of the Orchard Core components and, hopefully, by the end it will become much clear how all of them interact with each other. So for now, the planning is:
- Part 01: The basic Orchard Core project. (This article)
- Part 02: Create a Orchard Core Theme.
- Part 03: Create a Orchard Core Recipe.
- Part 04: Create a Orchard Core Module. …
My Development Environment
As part of my learning path, because I’m learning how to develop with Orchard and i’m working with dotnet, I perform my proof of concept on:
- MacBook Pro (Retina, 13-inch, Late 2012)
- Running MacOS Catalina (10.15.5)
- For IDE, I’m using:
- Jetbrains Rider 10.15.5 (19F101)
- Visual Studio Community 2019 for Mac (Preview)
- Version 8.7 Preview (8.7 build 1077)
Why I’m using both Rider and Visual Studio for Mac? Well, I decided to try it out the Rider, however from times to times this IDE becomes possed by the Evil and presents an erractic behavior (eg: in renaming files, doesn’t allow fill the name). So since I’m still in the begining, I’m alterning between Rider and the VS for Mac, but VS for MAC isn’t VS for Windows. Rider isn’t like VS for Windows either but seems more alike than VS for Mac…. and I have a license for Rider :).
Before I start
My first recomendation is to clone the Orchard Core github repository. The official documentation is a work in progress. The reference, for an individual unit, the documentation is enough, but when trying to combine with others components/modules/use cases there is something missing that glue them up. The source code will assist within the nugets we need to install, or understand what component is doing.
The how-to/sample/use cases are simple and most of them use the out-of-the box components. I’m not complaining, ok?! It is a valid approach, I use them for starting up and I’ll be reference them through this (and following articles).
I recommend to clone, also, Orchard Core Samples, this provides some use cases samples, allowing to check the code how stuff is done/configured. You can also check in the Orchard Core github repository how the modules, themes, etc are “made”.
Orchard made available some Project Templates for dotnet core to simplifly the project constuction. For the time being, I do not recomment you use them, at least until you fully understand the basics. Otherwise it may seem back magic.
There are some other links, at reference section, that I used within my journey.
Getting Started
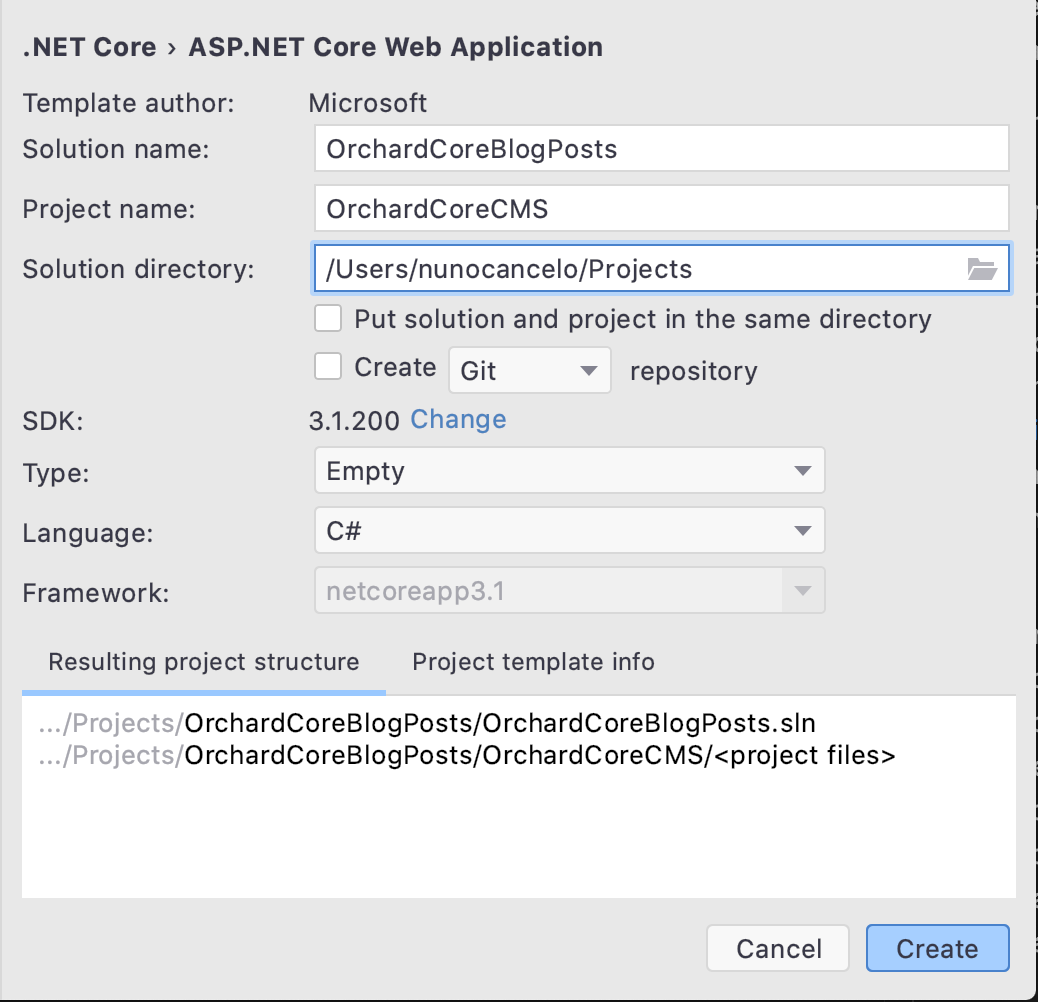
I will start by creting a new netcore 3.1 Web Application solution:

Since Orchard Core currently is in preview we nee to configure the preview feed.
Configuring the preview feed
There is two aways to configure the feed, either by adding it to you nugget sources list or by creating a Nuget.config at the root of the solution folder.
Nuget.config
<?xml version="1.0" encoding="utf-8"?>
<configuration>
    <packageSources>
        <clear />
        <add key="NuGet" value="https://api.nuget.org/v3/index.json" />
        <add key="OrchardCorePreview" value="https://nuget.cloudsmith.io/orchardcore/preview/v3/index.json" />
    </packageSources>
    <disabledPackageSources />
</configuration>
After adding the Nuget.config restart the IDE.
Import Orchard Core Nuget package
The are two major nuget packages for Orchard Core. From this documentation page we can read:
Orchard Core is available for use via two different NuGet meta packages.
- OrchardCore.Application.Cms.Core.Targets
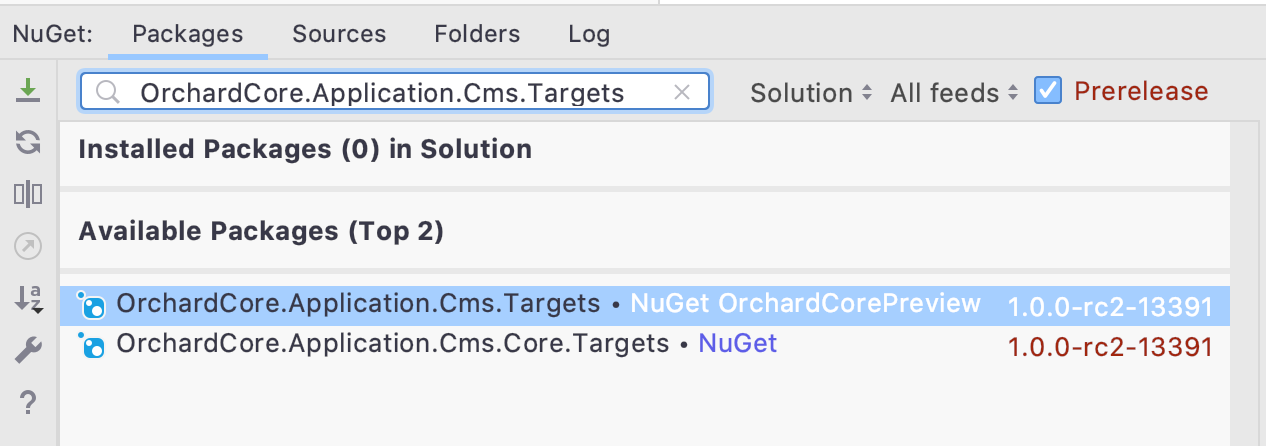
- OrchardCore.Application.Cms.Targets
The first package OrchardCore.Application.Cms.Core.Targets is intended for use when
Developing a Decoupled Web Site Developing a Headless Web Site Developing a Themed Web Site from scratch
The second package OrchardCore.Application.Cms.Targets contains all of the above plus
Setup recipes for the Themes Multiple CMS Starter Themes
So, I choose the OrchardCore.Application.Cms.Targets nuget package. Remember that these nuggets are still in preview:

Just add it to the project.
Edit Startup.cs
In order to our project support Orchard Core we need to change the Startup.cs file.
- Add/Edit ConfigureServices method
public void ConfigureServices(IServiceCollection services) { services.AddOrchardCms(); } - Edit Configure method
public void Configure(IApplicationBuilder app, IWebHostEnvironment env)
{
 if (env.IsDevelopment())
 {
     app.UseDeveloperExceptionPage();
 }
 app.UseStaticFiles();
 app.UseOrchardCore();
}
Clean, Build and Start the Application
For now, we are done. Let us do a clean, build and start the application.
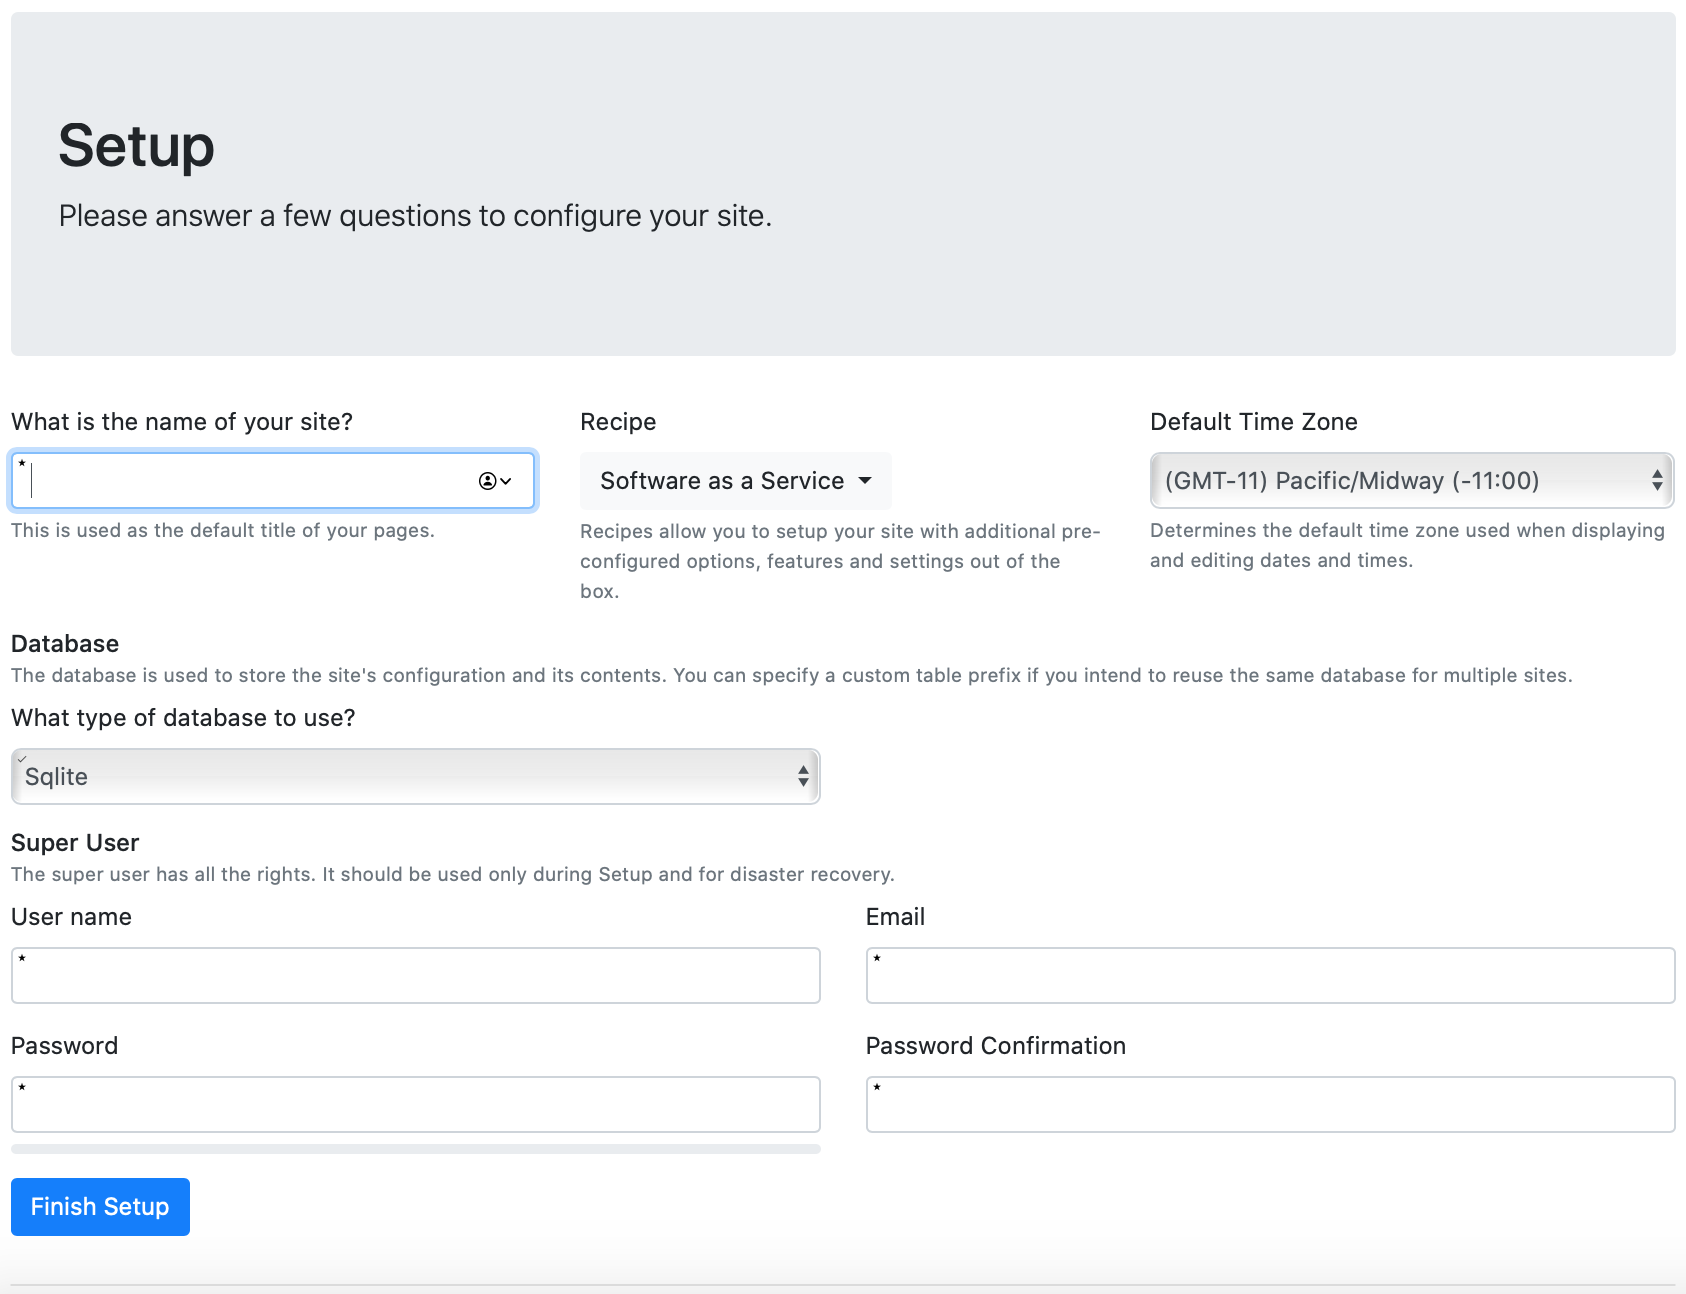
As the application starts, we get the Orchard Core setup page:

Most of the form fields are configuration, such as the name of the site, which database we will be using (defaul is sqlite) and admin user settings and credentials.
However there is something new, what it is called as “Recipes”, and they define recipes as:
Recipes allow you to setup your site with additional pre-configured options, features and settings out of the box.
Out of the box, there are five recipes:
- Empty Recipe
- Blog Recipe
- Agency Recipe
- ComingSoon Recipe
- SaaS Recipe
Their description and goals may be found on this documentation page.
To access the admin page, just type “https://localhost:5001/admin”.
Knowledge Consolidation
Choose one recipe and navigate through the CMS functionalities and try it out. See how the components glue each other, what each recipe have to offer.
To try another recipe, just delete App_Data folder, run the application again and choose another recipe.
I recommend you to read the “Different website building strategies” to reflect the different between the strategies.
For this article series I’ll take the “Decoupled CMS” approach.
In the next article, I’ll explain how we can develop a custom Orchard Core Template.
Conclusion
In this first article about Orchard Core, the goal was to do the minimal configurations to have Orchard Core CMS up and running, and spent some time testing each “recipe” to study their habilities. So far, with the help from the official documentation, it has been straight forward.
Next articles will become more interesting. :)
Resources
- Official site: https://www.orchardcore.net
- Orchard Doje by Lombiq: https://orcharddojo.net/orchard-resources/CoreLibrary/
- Lombiq Youtube Channel: https://www.youtube.com/channel/UCDVUxCz2RvkgTbA0wAYKwRA
- Orchard CMS net Youtube Channel: https://www.youtube.com/channel/UCOPLovO0E8kfliE5bF9Y2Yg
- Orchard Skills Youtube Channel: https://www.youtube.com/channel/UCTwti4IV-uER89I39lTln0Q
- Visual Studio for Mac: https://visualstudio.microsoft.com/vs/mac/
- Jetbrains Rider: https://www.jetbrains.com/rider/